从 Kapi commit b1577d8 / a3a476f 完整移植 5 个修复,覆盖三类问题:
1. 开机/唤醒后按 BOOT 进 RTC 房间,欢迎语前 1-3 秒杂音
2. 软 RTC 退出(41s 无对话触发 Dialog watchdog)后待命音"卡卡正在待命"无声/杂音/被截
3. 软退出后按 BOOT 唤醒,欢迎语前杂音

【修复 1】OnAudioChannelOpened EnableOutput(true) 后立刻灌 200ms silence
  - 防止 I2S DMA 启动后到 RTC 真实 PCM 到达 1-3s 空窗的杂音

【修复 2】LeaveRoom 加 notify_closed 参数(默认 true 不变老路径)
  - hibernate 路径传 false 跳过 on_audio_channel_closed_ 回调
  - 避免回调链 player_pipeline_close → EnableOutput(false) 误关 codec
    导致待命音无声

【修复 3】LeaveRoom 不再 volc_rtc_destroy, 保留 rtc_handle_
  - 唤醒时 OpenAudioChannel 直接 volc_rtc_start 复用 handle, 不死循环
  - 服务端 AI 任务无需 destroy 也会按 180s 兜底机制清理

【修复 4 - 最隐蔽】LeaveRoom 末尾重置 downlink_is_pcm_ = false
  - 火山 RTC 下行是 PCM, DataCallback 设 downlink_is_pcm_=true
  - 不重置 → PlaySound 的 Opus 包被 OnAudioOutput 当成 raw PCM 字节流
    直接写 codec → 杂音而非待命音
  - 唤醒重连后 DataCallback 收下一包会自动重置, 不影响欢迎语

【修复 5】OnAudioInput 入口加 hibernating_ guard
  - hibernate 期间禁用输入侧, 防止访问关闭的 codec → std::bad_alloc abort
  - 不冻结 OnAudioOutput, 让待命音队列正常被消费

【EnterIdleHibernate 重写】套用 Kapi 新顺序:
  Step 0: hibernating_=true + 50ms (让 OnAudioInput guard 生效)
  Step 1: LeaveRoom(false) (codec output 保留)
  Step 2: background_task->WaitForCompletion
  Step 3: 清空 audio_decode_queue_
  Step 4: EnableInput(false) + close recorder_pipeline
  Step 5: 强制 esp_pm 禁用 Light Sleep
  Step 5.5: EnableOutput(false→true) + 200ms silence (清 LeaveRoom 副作用)
  Step 6: SetDeviceState(idle) → PlaySound 待命音
  Step 7: WaitForAudioPlayback (队列消费完毕)
  Step 7.5: background_task->WaitForCompletion + vTaskDelay(1000)
            (DMA + ES8311 FIFO + 功放尾音衰减, 防尾音截断)
  Step 8: player_pipeline_close
  Step 9: NVS idle_cycles_++
  Step 10: 显示字幕"已自动退出RTC对话..."(数字人特有, 保留)

【WakeFromHibernate】调整 hibernating_=false 顺序
  - 先放下 hibernating_, 让 ToggleChatState 期间 OnAudioInput guard 通过
  - 否则 ToggleChatState 期间音频上行迟迟不开

编译: kapi.bin 0x41c000 (4.21MB), 分区 25% 空闲。
实测三项全通: 欢迎语干净 + 待命音清晰完整 + 唤醒欢迎语干净。

Co-Authored-By: Claude Opus 4.7 (1M context) <noreply@anthropic.com>
XiaoZhi AI Chatbot
Introduction
👉 Build your AI chat companion with ESP32+SenseVoice+Qwen72B!【bilibili】
👉 Equipping XiaoZhi with DeepSeek's smart brain【bilibili】
👉 Build your own AI companion, a beginner's guide【bilibili】
Project Purpose
This is an open-source project released under the MIT license, allowing anyone to use it freely, including for commercial purposes.
Through this project, we aim to help more people get started with AI hardware development and understand how to implement rapidly evolving large language models in actual hardware devices. Whether you're a student interested in AI or a developer exploring new technologies, this project offers valuable learning experiences.
Everyone is welcome to participate in the project's development and improvement. If you have any ideas or suggestions, please feel free to raise an Issue or join the chat group.
Learning & Discussion QQ Group: 376893254
Implemented Features
- Wi-Fi / ML307 Cat.1 4G
- BOOT button wake-up and interruption, supporting both click and long-press triggers
- Offline voice wake-up ESP-SR
- Streaming voice dialogue (WebSocket or UDP protocol)
- Support for 5 languages: Mandarin, Cantonese, English, Japanese, Korean SenseVoice
- Voice print recognition to identify who's calling AI's name 3D Speaker
- Large model TTS (Volcano Engine or CosyVoice)
- Large Language Models (Qwen, DeepSeek, Doubao)
- Configurable prompts and voice tones (custom characters)
- Short-term memory, self-summarizing after each conversation round
- OLED / LCD display showing signal strength or conversation content
- Support for LCD image expressions
- Multi-language support (Chinese, English)
Hardware Section
Breadboard DIY Practice
See the Feishu document tutorial:
👉 XiaoZhi AI Chatbot Encyclopedia
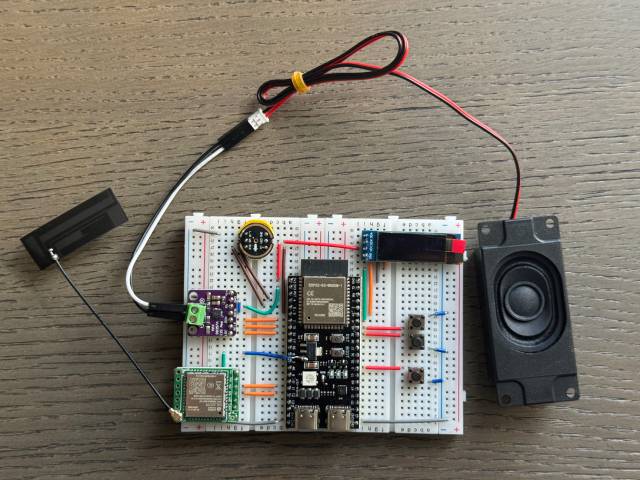
Breadboard demonstration:
Supported Open Source Hardware
- LiChuang ESP32-S3 Development Board
- Espressif ESP32-S3-BOX3
- M5Stack CoreS3
- AtomS3R + Echo Base
- AtomMatrix + Echo Base
- Magic Button 2.4
- Waveshare ESP32-S3-Touch-AMOLED-1.8
- LILYGO T-Circle-S3
- XiaGe Mini C3
- Moji XiaoZhi AI Derivative Version
- CuiCan AI pendant
- WMnologo-Xingzhi-1.54TFT
- SenseCAP Watcher


Firmware Section
Flashing Without Development Environment
For beginners, it's recommended to first use the firmware that can be flashed without setting up a development environment.
The firmware connects to the official xiaozhi.me server by default. Currently, personal users can register an account to use the Qwen real-time model for free.
👉 Flash Firmware Guide (No IDF Environment)
Development Environment
- Cursor or VSCode
- Install ESP-IDF plugin, select SDK version 5.3 or above
- Linux is preferred over Windows for faster compilation and fewer driver issues
- Use Google C++ code style, ensure compliance when submitting code
Developer Documentation
- Board Customization Guide - Learn how to create custom board adaptations for XiaoZhi
- IoT Control Module - Understand how to control IoT devices through AI voice commands
AI Agent Configuration
If you already have a XiaoZhi AI chatbot device, you can configure it through the xiaozhi.me console.
👉 Backend Operation Tutorial (Old Interface)
Technical Principles and Private Deployment
👉 Detailed WebSocket Communication Protocol Documentation
For server deployment on personal computers, refer to another MIT-licensed project xiaozhi-esp32-server